Mamaput Hub: Appwrite Hashnode Hackathon
What happens when food and code come together? An epic fusion of Appwrite and Nigerian delicacy unveiled with Mamaput Hub!


Are you a food lover or a culinary enthusiast? Do you love cooking, creating recipes, and experimenting from time to time with food? Then Mamaput Hub is the only web app you will ever need!
This article represents our submission for the Appwrite x Hashnode Hackathon. We're excited to showcase our project, Mamaput Hub, and how we've leveraged the power of Appwrite's backend capabilities.


Team Details
Meet the team members involved in making Mamaput Hub a reality.
Ajanaku David Osehon - @ColdShot1
Uche-Nwosu Chioma Audrey - @itsjustchioma
Description of Project
Mamaput Hub is the perfect web app created to satisfy your culinary cravings. With this web app, you can create your recipes, share them with the community of food lovers, and save your favorite recipes for future cooking endeavors.
Additionally, Mamaput Hub takes the hassle out of grocery shopping. With its shopping list feature, you can simply create a list with all the ingredients and it will be added to your list!
Let’s take a closer look at each of the features of Mamaput Hub.
What does Mamaput Hub do?
This amazing product has several amazing features, so let's explore them one by one:
1. Create Recipes and Post Them

Mamaput Hub empowers users to unleash their culinary creativity by providing a platform to create, document, and share their own recipes.

2. Browse Recipes


Our app offers a vast and diverse collection of recipes from talented cooks and food enthusiasts worldwide.

From quick weeknight dinners to elaborate gourmet creations, there's a recipe to suit every taste and occasion.
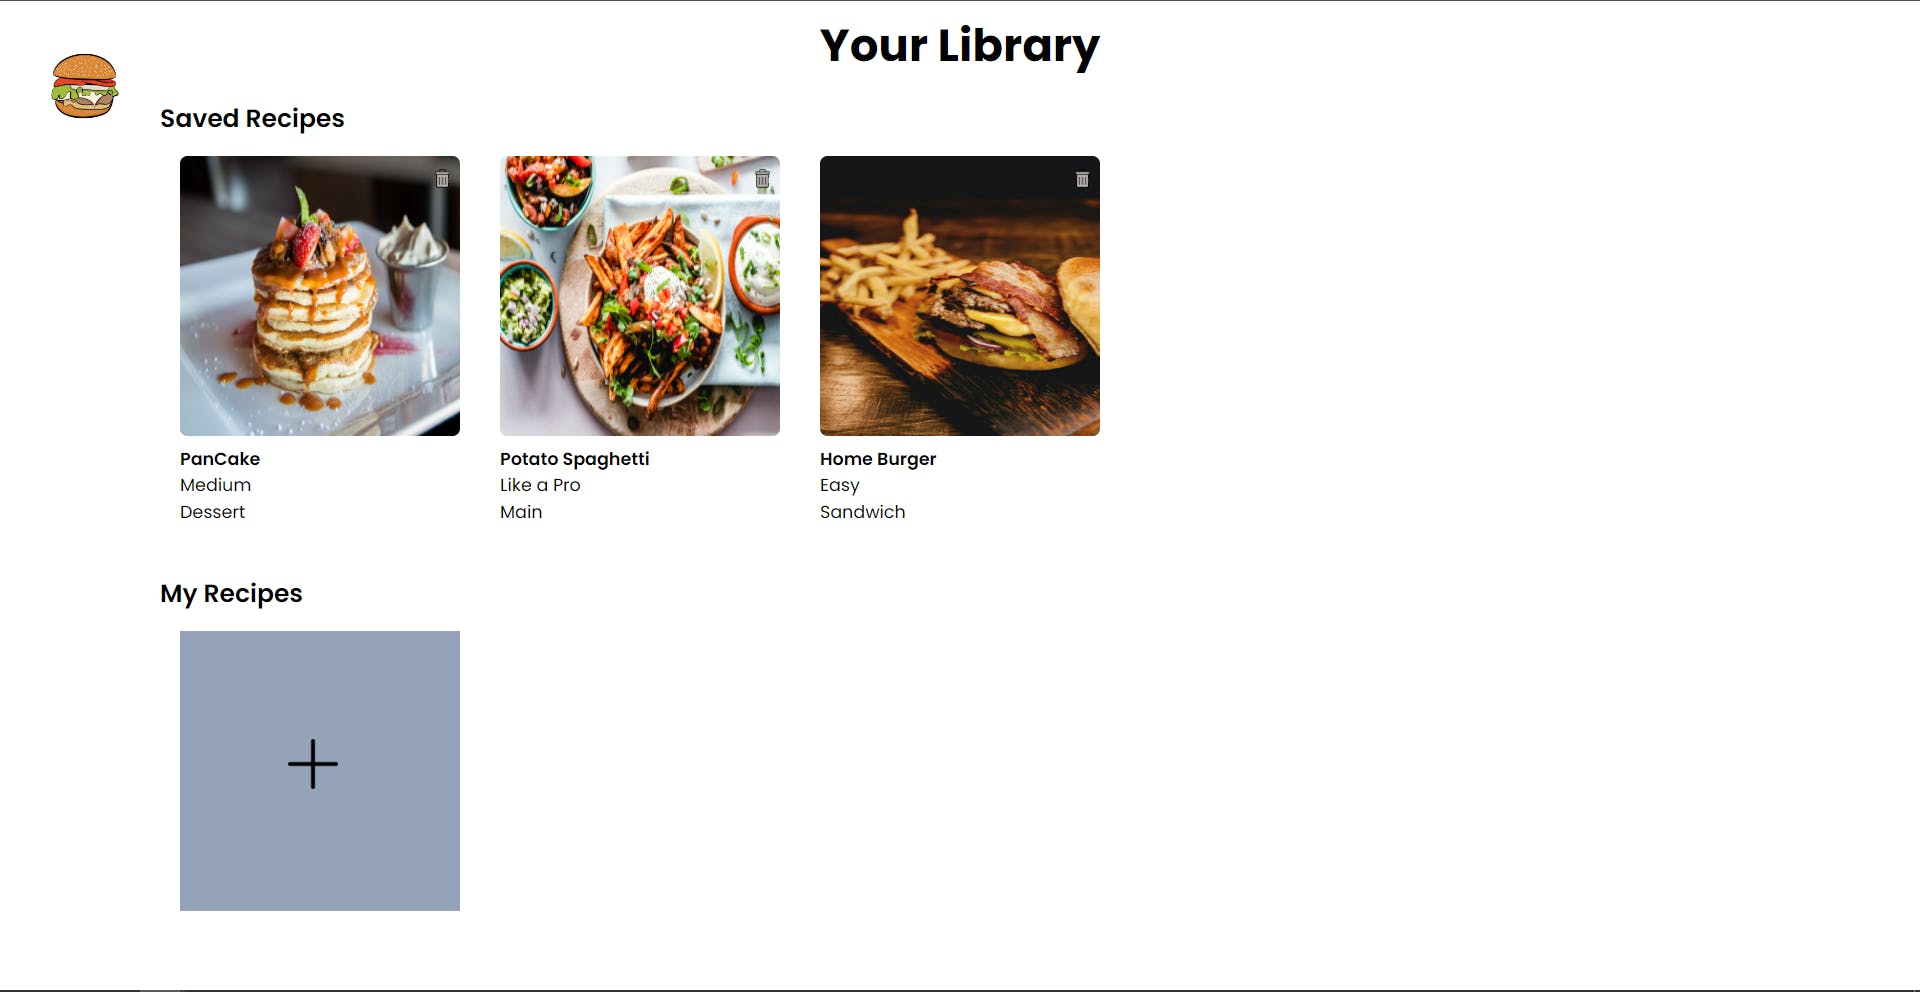
3. Save Recipes

To help users keep track of their favorite recipes, Mamaput Hub allows them to save recipes to their personal library.

4. Create Shopping Lists
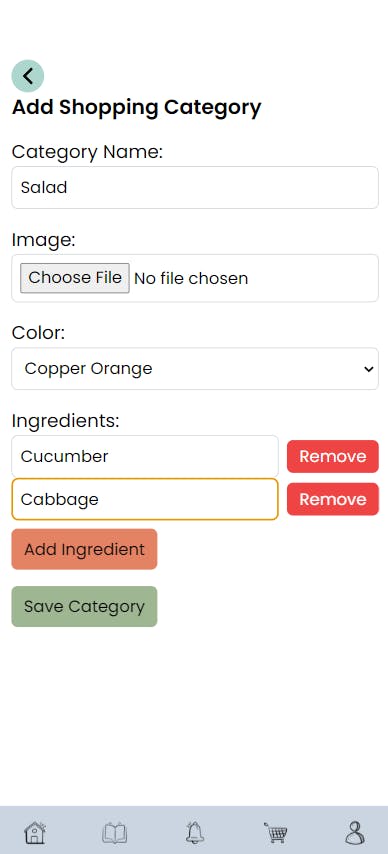

Planning and organizing ingredients can sometimes be a hassle, but not with Mamaput Hub. Our app simplifies the grocery shopping experience by enabling users to create custom shopping lists based on the recipes they want to try.

Why we chose to tackle this challenge.
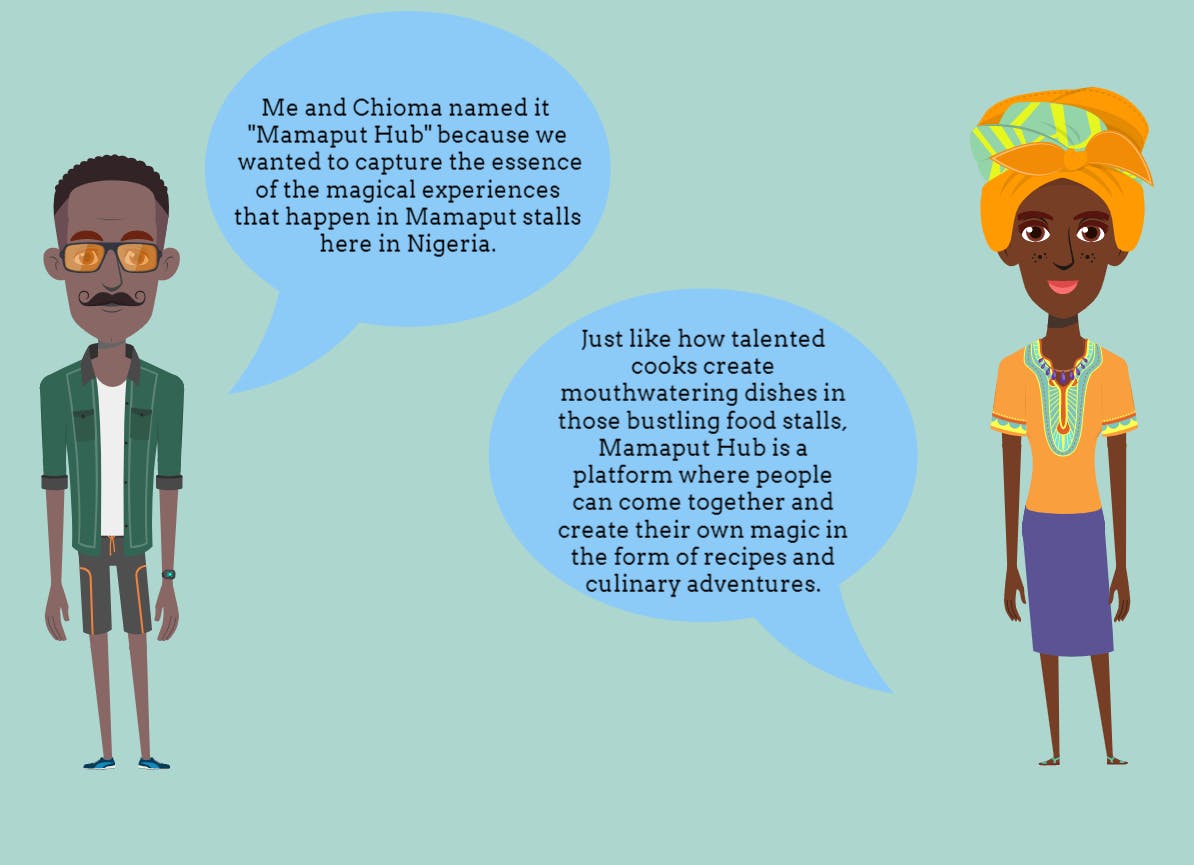
Through Mamaput Hub, we aim to recreate that sense of community, joy, and culinary exploration. We wanted to provide a platform where food lovers of any age could connect, share their passion for cooking, and celebrate the diverse flavors that make our world so vibrant.
By bringing together technology, creativity, and a deep appreciation for our culinary roots, we hope to inspire others to explore, create, and share their own culinary magic.
Tech Stack
The project was built using the following technologies, methods, and platforms:
ReactJS - This was used to build the user interface.
Tailwind CSS - This was used for styling the web application.
GitHub - This was used for version control and collaboration.
Vercel - This was used to ensure smooth deployment and hosting of our web application, making it accessible to users worldwide.
Let's take a closer look at how Appwrite helped us build this web application.
How and Why We Used Appwrite.
We used Appwrite as a backend platform to make our development process more manageable. Appwrite offered us many useful features that helped us successfully build our project. In this section, we'll explain how and why we chose to use Appwrite in our development.
Why?
These are the reasons we used Appwrite:
Simplified Authentication and User Management
Appwrite made it simple for us to handle user registration, login, and account management. We could easily integrate these features into our application using Appwrite's tools. This saved us a lot of time and allowed us to focus on other important parts of our project.
Easy Database Management
With Appwrite's database service, managing our data became effortless. We could store and retrieve recipe and shopping list data smoothly using Appwrite's user-friendly database structure.
Secure File Storage and Management
Appwrite helped us securely store and retrieve images for our recipes and shopping lists. We could easily manage the files without the need for a separate storage system.
Developer-Friendly Documentation and Support
Appwrite provided us with clear documentation and helpful community support throughout our project. The documentation included instructions, code examples, and references that made it easier for us to understand and use Appwrite's features.
How Appwrite helped us build Mamaput Hub.
To get started with Appwrite, these are the steps we took:
Install Appwrite SDK
npm install appwriteImport the necessary Appwrite modules
import { Client, Account, Databases, Storage, } from "appwrite";
- Initialize the Appwrite SDK with your project details.
const client = new Client();
client
  .setEndpoint("YOUR_API_ENDPOINT")
  .setProject("YOUR_PROJECT_ID");

export const account = new Account(client);
export const storage = new Storage(client);
export const databases = new Databases(client, "DATABASE_ID");
export const userId = account.get();
- Start using Appwrite services! Let's say we want to create a function that saves users' profiles.
export const saveProfile = async (profile) => {
  try {
    const documentId = uuidv4(); // Generate a random UUID
    const savedProfile = await databases.createDocument(
      "PROJECT_ID", // Your project ID
      "COLLECTION_ID", // Collection ID for the user profiles collection
        documentId,
       profile, // Pass the profile object as the value for the 'data' parameter
    );
    return savedProfile;
  } catch (error) {
    throw new Error(error);
  }
};
- Run the project Run the following command to start the development server:
npm run dev
Can't find your ProjectID, DatabaseID, and CollectionID? Here is how you can find it.
Create an account on Appwrite. Once you are logged in, you will be taken to the dashboard.
Create a project.

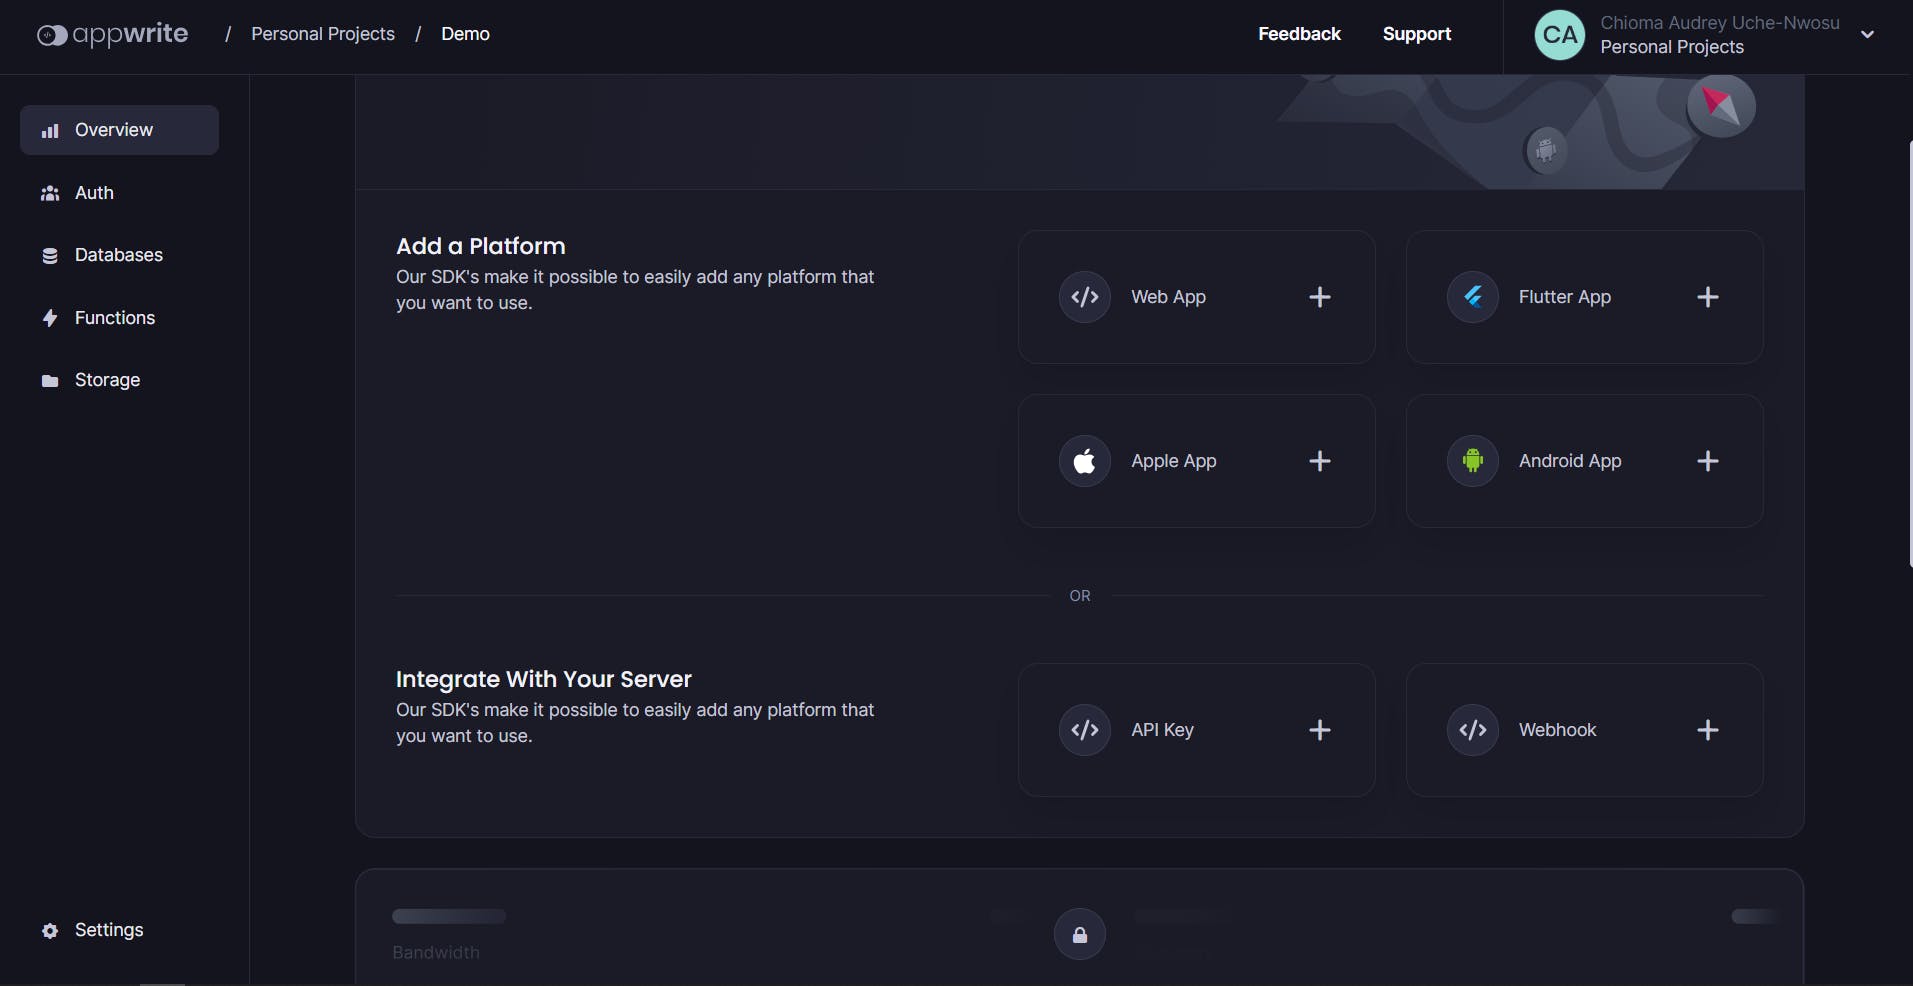
After creating the project, you will be redirected to the project overview page.

From the project overview page, you can navigate through different tabs to explore and configure various Appwrite features such as authentication, database, storage, functions, and more.
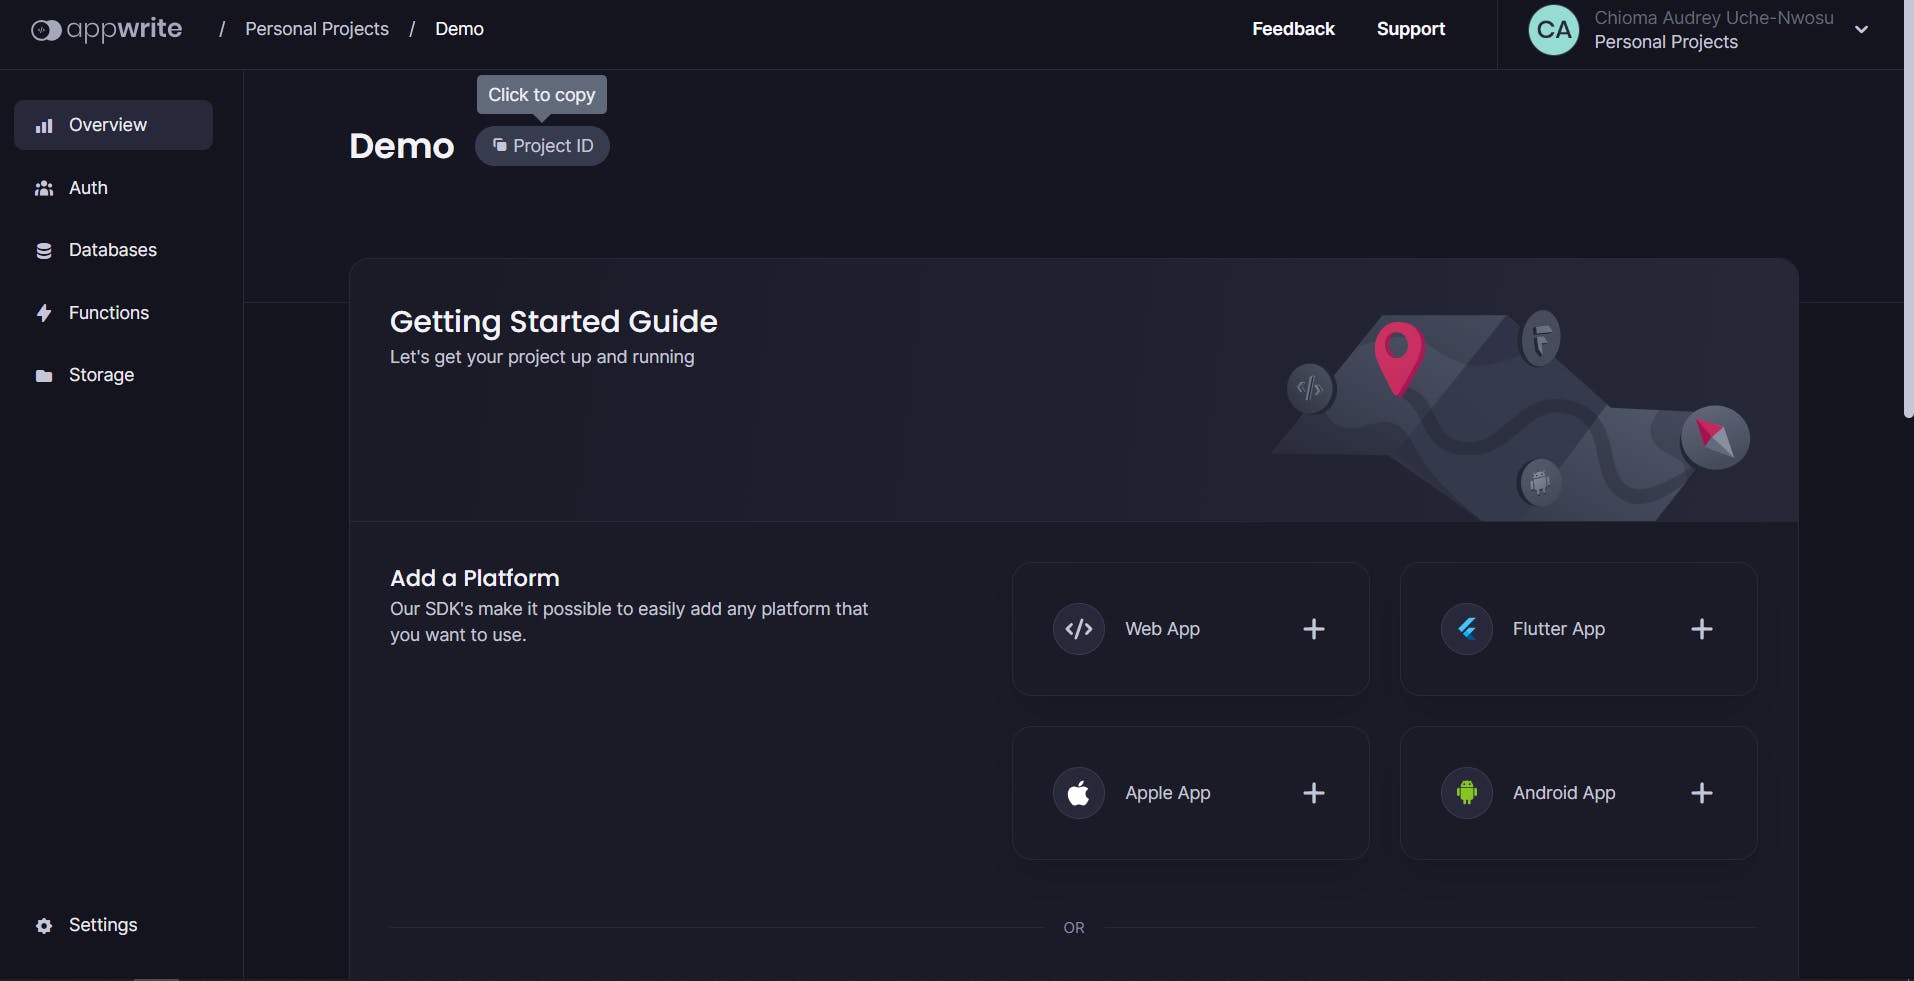
Access project API credentials: To access your project's ID, click on "Project ID" beside your project name as shown below.
To create a database:

To access the Database ID, click on "Database ID" beside the Database's name

The same applies to Collections.

For the Collection ID:


Appwrite Cloud
Appwrite Cloud made it easier for us to build Mamaput Hub by providing a backend platform that handled complex technical aspects, allowing us to focus on the front end of our application.
Authentication
Appwrite simplified the process of verifying users' identities and ensuring secure access to our app. It helped us implement features like user registration, login, and password management, making it easy for people to use our app securely.
Database
Appwrite's database service helped us store and organize data efficiently. We could easily manage and retrieve information without worrying about the technical details of database management.
Account API: Authentication and User Management
The Account API provided by Appwrite helped us manage user accounts effectively. We could handle user authentication, registration, and password-related tasks easily.
Storage API: File Storage and Management
With Appwrite's Storage API, we could store and manage files in our app, such as images and documents. It made it easy for us to handle file uploads, downloads, and organization.
Query
Appwrite's Query offers powerful querying capabilities that allow us to retrieve specific data from the database with ease. With the Query, we can create complex queries to filter, sort, and paginate data based on various criteria. This helped us create the search bar that allows users to search for recipes.
Challenges We Faced and How They Were Overcome.
During the development process, we encountered a few challenges. These include the following:
1. Create Recipes and Post Them
One of the challenges we encountered when implementing the recipe creation feature was linking the saved recipes to the user’s account and displaying them correctly. Initially, we struggled with the logic behind this feature.

We achieved this by doing the following:
a. Linking saved recipes to the user's account:
// Inside the appwriteConfig file
export const userId = account.get();

// Inside the NewRecipe component
const userIdResponse = await userId;
const userId = userIdResponse.$id;

// When creating the recipe
const savedRecipe = await databases.createDocument(
  "PROJECT_ID", // Our project ID
  "COLLECTION_ID", // Collection ID for User Saved Recipe collection
  documentId, // Used the generated UUID as the document ID
  { ...recipe, userId } // Included userId in the recipe data
);
We utilized the
account.getfunction fromappwriteConfigto retrieve the user's ID.The user's ID was then used to establish a connection between the saved recipes and the user's account.
We accessed the user's ID by calling the
response.$idproperty.
b. Displaying the user's saved recipes:
After linking the saved recipes to the user's account, we were able to retrieve and list the user's saved recipes. We used the userId in the formData to fetch the user's saved recipes.
// Inside the Recipes component
const userIdResponse = await userId;
const userId = userIdResponse.$id;

// Fetching the user's saved recipes
const promise = databases.listDocuments(
  "PROJECT_ID", // Our project ID
  "COLLECTION_ID", // Collection ID for User Saved Recipe collection
  [
    Query.equal('userId', userId) // Query for recipes with matching userId
  ]
);

const response = await promise;
const savedRecipes = response.documents;
2. Browse Recipes
During the development of the browse recipes feature, we faced the challenge of incorporating images into the recipes and storing them appropriately. Through exploration of the documentation, we found that directly saving images to normal collections wouldn’t work.

To incorporate images into the recipes and store them appropriately, we used Appwrite's Storage API. Here's how we achieved this:
a. Upload Recipe Image: To upload a recipe image, we used the storage.createFile method.
import { storage } from 'appwrite';

// Inside the NewRecipe component

const uploadImage = async (file) => {
  try {
    const response = await storage.createFile(file);

    console.log('Image uploaded:', response);

    // Used the response.$id to link the image to the recipe or store it for later use
    const imageId = response.$id;

    // ... additional logic

    return imageId;
  } catch (error) {
    console.error('Error uploading image:', error);
    throw error;
  }
};

// Usage
const imageFile = ... // Get the image file from the user
const imageId = await uploadImage(imageFile);
b. Storing Image ID in the Recipe: Once the image is uploaded, we can store the image ID in the recipe document.
// Inside the createRecipe function

const createRecipe = async (formData) => {
  try {
    // ... existing code

    const imageFile = ... // Get the image file from the user
    const imageId = await uploadImage(imageFile);

    // Add the imageId to the recipe data
    formData.imageId = imageId;

    // ... remaining code
  } catch (error) {
    console.error('Error creating recipe:', error);
    throw error;
  }
};
c. Displaying Recipe Images: To display recipe images, we used the storage.getFileView method.
import { storage } from 'appwrite';

// Inside the Recipe component

const getImageUrl = async (imageId) => {
  try {
    const response = await storage.getFileView(imageId);

    // Use the response.$url to get the image URL
    const imageUrl = response.$url;

    return imageUrl;
  } catch (error) {
    console.error('Error retrieving image URL:', error);
    throw error;
  }
};

// Usage
const imageUrl = await getImageUrl(recipe.imageId);
3. Save Recipes
When implementing the functionality to save recipes, we had to handle various IDs, including the database ID, bucket ID, and file ID. This required careful management to ensure the smooth integration of the feature.
This is how we achieved it:
a. Linking saved recipes to the user's account: Inside the SavedRecipe.js component, we retrieved the user's ID using the account.get() function from appwriteConfig:
const user = account.get();
const userId = user.$id; // Extract the user ID
b. Saving the recipe: When creating a recipe, we included the userId in the recipe data to link it to the user:
const savedRecipe = await databases.createDocument(
  "PROJECT_ID", // The project ID
  "COLLECTION_ID", // Collection ID for User Saved Recipe collection
  documentId, // Use the generated UUID as the document ID
  { ...recipe, userId } // Include userId in the recipe data
);
c. Displaying the user's saved recipes: To fetch and display the user's saved recipes, we used the listDocuments method with a query that matches the userId:
const promise = databases.listDocuments(
  "PROJECT_ID", // The project ID
  "COLLECTION_ID", // Collection ID for User Saved Recipe collection
  [
    Query.equal('userId', userId) // Query for recipes with matching userId
  ]
);

const response = await promise;
const savedRecipes = response.documents;
We then used the savedRecipes array to render the saved recipes in the UI.
4. Create Shopping Lists
For creating shopping lists, we encountered the challenge of handling image storage and linking it to the appropriate collections. Initially, we had to deal with temporary strings and objects to manage the image data.
const handleSaveCategory = async (event) => {

    const fileInput = document.getElementById("imageUpload");
    const file = fileInput.files[0];
    const fileId = uuidv4(); // Generate a random UUID

    const newImage = await storage.createFile(
      "COLLECTION_ID",
      fileId,
      file
    );
    const imageUrl = `BUCKETS_URL`;

    const newCategory = {
      userId: (await userId).$id,
      category_name: categoryName,
      picture: imageUrl, // Use the image URL in the newCategory object
      color: selectedColor,
      ingredients: ingredientList,
    };

    console.log("New Category:", newCatego
    try {
      const documentId = uuidv4(); // Generate a random UUID
      const response = await databases.createDocument(
        "PROJECT_ID", // Your project ID
        "COLLECTION_ID", // Your collection ID
        documentId, // Use the generated UUID as the document ID
        newCategory
      );
      navigate("/shopping");
      return response; // Optionally, return the created recipe document
    } catch (error) {
      throw error;
    }
  };
5. Personalized User Library
To provide a personalized user experience, we wanted to display the user’s name automatically when creating recipes, eliminating the need for manual input. Retrieving the user’s name from the user ID posed a challenge initially.

The account.get() function retrieves the user account information, and when the promise resolves successfully, it updates the formData state by setting the userId and username properties using the setFormData function. These values can then be used when creating the recipe.
const [formData, setFormData] = useState({
  picture: "",
  name: "",
  description: "",
  level: "",
  servings: 0,
  type: "",
  ingredients: [],
  steps: [],
  userId: "",
  username: "",
});

useEffect(() => {
  account.get().then(
    (response) => {
      setFormData((prevData) => ({
        ...prevData,
        userId: response.$id,
        username: response.name,
      }));
    },
    (error) => {
      console.log(error);
    }
  );
}, []);
Throughout the development process, we encountered challenges but persisted in finding solutions. By printing out the image URL to the console for verification, implementing dynamic navigation to display complete recipes, and utilizing the functionality provided by Appwrite, we were able to overcome these obstacles.
Public Code Repo
This is the GitHub public code repository: github.com/itsjustchioma/mama-put-hub
Demo Link
This is the demo link to our web application, Mamaput Hub: mama-put-hub.vercel.app
You can check it out on Build With Appwrite too.
Demo login details:
Email: userappwrite@appwrite.com , Password: UserAppwrite
Demo Recording of Mamaput Hub
Here is a demo recording of Mamaput Hub.
Summary
Mamaput Hub is a web app that celebrates food and community in this article. Through Appwrite's backend server and its collaboration with Hashnode, Mamaput Hub connects food lovers of all ages to create, share, and discover recipes.
With Appwrite's seamless integration, secure authentication, efficient data storage, and real-time updates become a breeze. As Appwrite and Hashnode collaborate to bring Mamaput Hub to life, we invite you to join us on this culinary journey.
Thank you Hashnode and Appwrite for giving us this opportunity to showcase Mamaput Hub!

#Appwrite #HashnodexAppwrite #AppwriteHackathon #appwrite @appwrite @hashnode